Posted by JTSF at Monday, July 15, 2013
Read our previous post
Setup 3 - U-NAS 2.0 Test Results
1. Performance Tests
Click to enlarge

RAID 1 Performance Tests Results

*U-NAS do not have system temperature statistics.
RAID 1 Performance Tests Screenshots
Image are 1280x 996; click to enlarge ; if still unclear - right click \ View Image \ Zoom Icon
RAID 5 Performance Tests Results
 *U-NAS do not have system temperature statistics.
RAID 5 Performance Tests Screenshots
Image are 1280x 996; click to enlarge ; if still unclear - right click \ View Image \ Zoom Icon
Performace Tests Remarks
U-NAS did considerably well in CIFS tests. It's performance is close to Setup 2 Synology DSM.
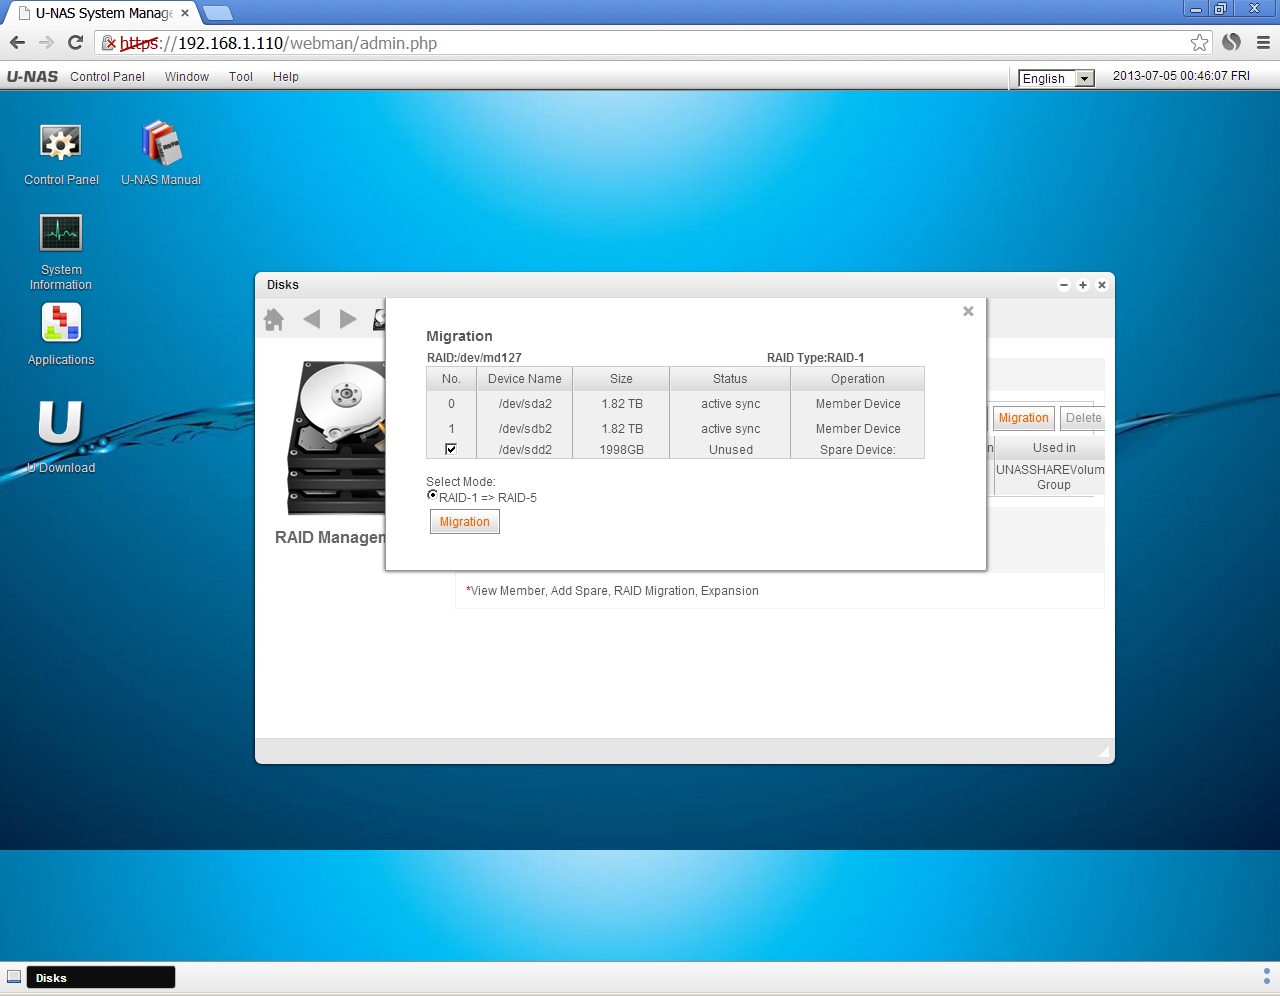
Appendix I - Creating RAID on U-NAS
Compared to the earlier two setups, it gets a little complex to create RAID on U-NAS. I decided to include the procedures here.
Summary
1. Create HDD partitions (Initiate the HDDs used in RAID)
2. Create RAID
3. Create Volume Group
4. Create Volume
5. Create Share Folder
RAID 1 Performance Tests Screenshots
Image are 1280x 996; click to enlarge ; if still unclear - right click \ View Image \ Zoom Icon
| Disk Info | Test 1 - Read from NAS | Test 1 - Read from NAS 2 |
 |  |  |
| Test 2 - Write to NAS 1 | Test 2 - Write to NAS 2 | Test 3 - 6 - CDM & NPT |
 |  |  |
| Create iSCSI Step 1 | Create iSCSI Step 2 | Create iSCSI Step 3 |
 |  |  |
| Create iSCSI Step 4 | Test 7 - iSCSI Read from NAS | Test 8 - iSCSI Write to NAS |
 |  |  |
| Test 9 - 10 - iSCSI CDM & NPT | ||
 |
RAID 5 Performance Tests Results

RAID 5 Performance Tests Screenshots
Image are 1280x 996; click to enlarge ; if still unclear - right click \ View Image \ Zoom Icon
| Disk Info | Test 1 - Read From NAS 1 | Test 1 - Read From NAS 2 |
 |  |  |
| Test 2 - Write to NAS | Test 2 - Write to NAS 2 | Test 3 - 6 - CDM & NPT |
 |  |  |
| Create iSCSI Step 1 | Create iSCSI Step 2 | Create iSCSI Step 3 |
 |  |  |
| Create iSCSI Step 4 | Test 7 - iSCSI Read from NAS | Test 8 - iSCSI Write to NAS |
 |  |  |
| Test 9 - 10 - iSCSI CDM & NPT | ||
 |
Performace Tests Remarks
U-NAS did considerably well in CIFS tests. It's performance is close to Setup 2 Synology DSM.
Appendix I - Creating RAID on U-NAS
Compared to the earlier two setups, it gets a little complex to create RAID on U-NAS. I decided to include the procedures here.
Summary
1. Create HDD partitions (Initiate the HDDs used in RAID)
2. Create RAID
3. Create Volume Group
4. Create Volume
5. Create Share Folder
| 1. Go to Disk | 2. Tick the HDDs used in creating the RAID and click on the button "Create Hard Drive" | 3. Select RAID type and click "Create" |
 |  |  |
| 4. The RAID enters "sync" status | 5. Next, browse to Volume Grp Mgr | 6. Create Volume Group |
 |  |  |
| 7. After Volume Group is created, click on "Add Volume button". Give it a name, decide the size & select the File system type. | 8. The Volume is now created. | 9. Lastly, navigate to Shares and create share folder |
 |  |  |
Go here for second part of the test: U-NAS Functionality Tests
No comments:
Post a Comment